Now that we know the MVC application is able to get to data in Flux using the API (did we expect anything less), we can look at making this do something useful. In this article we will;
- Introduce a link on the main site called “Help centre” which will take it’s content from a channel we will define (see previous article)
- Implement a content type to define general content pages for the help centre
- Implement a controller and view that will render these general content pages
- Have the general content page list a table of contents where there is content beneath them in the hierarchy or render a link back to the parent if there is content above them.
With this, we’ll be able to re-create the help content sections that you would normally find on most e-commerce sites.
Before I kick off with this one though, I should point out a couple of things. In no way shape or form is this lot production ready code! In an effort to be concise, and to the point, you’ll find quite stupid things in here like:
Which in a production site is a no-no. We should treat the content we’re rendering as unsafe and un-trusted and not just render it out willy-nilly like this. Also, you’ll notice no polishing like WYSIWYG editing in this sample – see my previous post on how to achieve this using fckEditor. I leave the removal of stupidity and the polishing as an exercise for the reader :)
Ok, so, here’s the final product of this article;

and

1. The “Help Center” link
The easiest part here – we created the help center link in the master page as follows;
                <ul id="menu">
                    <li><%= Html.ActionLink("Home", "Index", "Home")%></li>
                    <li><%= Html.ActionLink("Help Center", "HelpCenter", "Page")%></li>
                </ul>
This creates a link to the controller called PageController which will invoke the method HelpCenter. We then need to wire up the controller for this, but before we do any of that we may as well go ahead and setup flux to support the page content we need.
2. The new flux content type
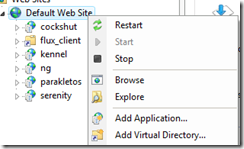
In flux we define a new content type for a content type called “Page” by creating a new folder containing a new XML type config and the administration form, as below. We also modify the channel content type definition to tell it to allow “Page” types to be added as children.

The code for the page content.type.config is as follows;
<NodeType ID="Page" Name="Simple Page Content" LimitVersions="10">

    <AddForm>~/settings/types/Page/form.aspx</AddForm>
    <EditForm>~/settings/types/Page/form.aspx</EditForm>

    <Relationships AddRoot="false">
        <Add>Page</Add>
    </Relationships>

</NodeType>
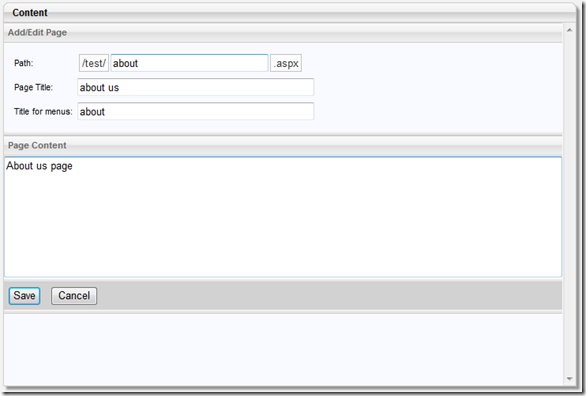
<%@ Page Language="C#" Inherits="Deepcode.Flux.Core.UI.CMS.CMSContentForm" ValidateRequest="false"%> <%@ Register TagPrefix="flux" Namespace="Deepcode.Flux.Core.UI.Controls" Assembly="Deepcode.Flux.Core"%> <script runat="server"> // Type ID being managed by this form protected override string FormTypeCode { get { return "Page"; } } // Do form setup protected override void SetupForm(int ContentID, int ParentID) { if (!Page.IsPostBack) { fPath.NodeIDParent = ParentID; fPath.NodeIDPathed = ContentID; } } // Save fields to content object protected override void SaveContent(ref Deepcode.Flux.Core.Systems.CMS.ContentObject save) { save.NodeName = this.fPath.Text; save.NodeTitle = this.fPageTitle.Text; save.Fields["body"] = this.fContent.Text; } // Load fields from content object protected override void LoadContent(Deepcode.Flux.Core.Systems.CMS.ContentObject load) { this.fPath.Text = load.NodeName; this.fPageTitle.Text = load.NodeTitle; this.fContent.Text = load.Fields["body"]; } </script> <html> <head id="Head1" runat="server"> <link href="../../../admin/Asset/Style/GeneralStyle.css" rel="Stylesheet" type="text/css" /> </head> <body class="nopadshaded"> <form id="form1" runat="server"> <flux:HostTable ID="HostTable1" runat="server"> <%-- Summary --%> <flux:ValidationSummarySection ID="ValidationSummarySection1" runat="server" HeaderText="Please correct the following errors"/> <%-- Form area --%> <flux:Section ID="Section1" runat="server" Title="Add/Edit Simple Page Content"> <flux:ShadePadBox ID="ShadePadBox1" runat="server"> <table cellspacing="0" cellpadding="3" border="0"> <tr><td>Path:</td> <td><flux:NodePath runat="server" ID="fPath" Width="200px" MaxLength="100"/></td> </tr> <tr><td>Page Title:</td> <td><asp:TextBox runat="server" ID="fPageTitle" Width="300px" MaxLength="500"/></td> </tr> </table> </flux:ShadePadBox> </flux:Section> <flux:Section runat="server" Title="Page Content"> <asp:TextBox runat="server" ID="fContent" Width="100%" Height="200px" TextMode="MultiLine"/> </flux:Section> <%-- Buttons --%> <flux:Section ID="Section3" runat="server"> <flux:PadBox ID="PadBox1" CssClass="Pad5Button" runat="server"> <asp:Button runat="server" ID="btnSave" Text="Save" OnClick="btnSave_Click" CssClass="button"/> <asp:Button runat="server" ID="btnCancel" Text="Cancel" OnClick="btnCancel_Click" CausesValidation="False"/> </flux:PadBox> </flux:Section> <%-- Validators --%> <asp:RequiredFieldValidator ID="RequiredFieldValidator1" runat="server" ControlToValidate="fPath" ErrorMessage="You must specify the path for this page" Display="None"/> <asp:RequiredFieldValidator ID="RequiredFieldValidator2" Runat="server" ControlToValidate="fPageTitle" ErrorMessage="You must specify the title of this page" Display="None"/> </flux:HostTable> </form> </body> </html>
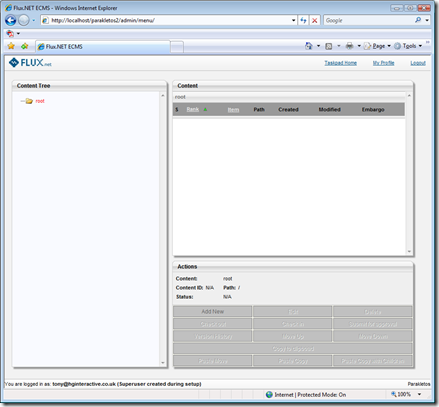
That then gives us this very simple management form in flux that we can use to define content.

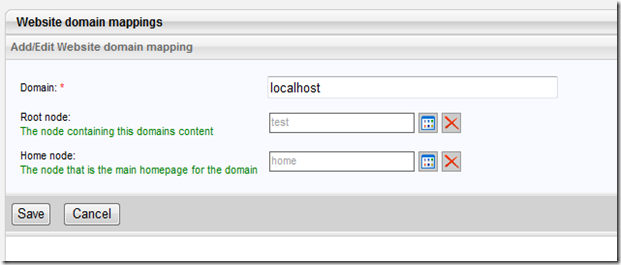
We need to go ahead and create some content for our help and support centre. the way I chose to structure this is to expect a channel path of /content/articles and a page node within that with a name of “HelpHome”. This would be the main help and support centre content page, and the child pages within that would cover the individual topics (see the images at the beginning of the post) – go ahead and create some content now.

3. and 4. - Rendering the general content pages
Being MVC, we need to consider the model (the data we’re going to render), the controller (the, um, controller of the app) and the view (the aspx code to render the model).
The controller is implemented as follows;
using System.Web.Mvc;
using MVCStore.Models;

namespace MVCStore.Controllers
{
    [HandleError]
    public class PageController : Controller
    {
        readonly ContentModel _modelProvider = new ContentModel();

        [AcceptVerbs(HttpVerbs.Get)]
        public ActionResult HelpCenter()
        {
            return View("PageContent", _modelProvider.GetHelpCentre());
        }

        [AcceptVerbs(HttpVerbs.Get)]
        public ActionResult PageContent(int pageId)
        {
            return View("PageContent", _modelProvider.GetPageForNodeId(pageId));
        }
    }
}
Note the model provider – this is some utility code we’ll build shortly to query the Flux content database. Our two controller methods are HelpCenter - which will get the help centres home page and render it and PageContent – which will use the same mechanics to render any page given the id of the content element.
The content model, which is created in /Models in this case is a mechanism to get the CMS data and return it in a way that the view is expecting. The code for ContentModel is shown below;
using System;
using Deepcode.Flux.Core.Systems.CMS;
using MVCStore.Views.Page;

namespace MVCStore.Models
{
    /// <summary>
    /// Provider to get content out of Flux as required
    /// </summary>
    public class ContentModel
    {
        public PageModel GetHelpCentre()
        {
            ContentQuery query = new ContentQuery();

            // Get the "Page" content item under /content/articles/ with the name "HelpHome"
            query.BaseMatch.AND(new StaticFieldMatch(ContentStaticField.Path, ContentQueryOperator.EQ, "/content/articles/"));
            query.BaseMatch.AND(new StaticFieldMatch(ContentStaticField.ContentType, ContentQueryOperator.EQ, "Page"));
            query.BaseMatch.AND(new StaticFieldMatch(ContentStaticField.Name, ContentQueryOperator.EQ, "HelpHome"));

            // Ensure we have a matching row
            ContentObject [] results = query.GetMatching();
            if (results.Length < 1)
                throw new InvalidOperationException("/content/articles/HelpHome page content does not exist");

            return CreatePageModelForNode(results[0]);
        }

        public PageModel GetPageForNodeId(int nodeId)
        {
            ContentObject node = ContentQuery.GetByID(nodeId);

            // Ensure we have a matching row
            if (node == null)
                throw new InvalidOperationException("content does not exist");

            return CreatePageModelForNode(node);
        }

        private PageModel CreatePageModelForNode(ContentObject node)
        {
            int parentNodeId = -1;

            // Only specify a parent IF it's also an item of content
            if (node.ParentLive.FK_STypeID == "Page")
                parentNodeId = node.FK_ParentID;

            PageModel result = new PageModel
            {
                ContentNodeId = node.PK_ID,
                PageContent = node.Fields["body"].Replace("\n", "<br/>"),
                PageTitle = node.NodeTitle,
                ParentNodeId = parentNodeId
            };

            foreach (ContentObject child in node.ChildrenLive)
                result.AddChild(child.PK_ID, child.NodeTitle);

            return result;
        }
    }
}
The GetHelpCentre method uses the content query engine exposed from flux to query for content within the channel path /content/articles, where the type of the entity is Page with a name of HelpHome – this corresponds to the help home page we prescribed earlier. This then assembles from the CMS data through to a PageModel, which is a view specific model that I’ll get to in a second.
The other method, GetPageForNodeId will also return a PageModel but for the content item with the given id number.
The view specific PageModel is;
using System.Collections.Generic;

namespace MVCStore.Views.Page
{
    /// <summary>
    /// View model for rendering page content with table of contents if there are children
    /// and rendering a link back to the parent if there is a parent....
    /// </summary>
    public class PageModel
    {
        public PageModel()
        {
            Children = new List<KeyValuePair<int, string>>();
        }

        /// <summary>
        /// The content id of this node
        /// </summary>
        public int ContentNodeId { get; set; }

        /// <summary>
        /// The content id of the parent node
        /// </summary>
        public int ParentNodeId { get; set; }

        /// <summary>
        /// The title of the page
        /// </summary>
        public string PageTitle { get; set; }

        /// <summary>
        /// The content for the page
        /// </summary>
        public string PageContent { get; set; }

        /// <summary>
        /// The children for this page that we want to list in a TOC
        /// the pairs are node id and page title.
        /// </summary>
        public IList<KeyValuePair<int, string>> Children { get; set; }

        /// <summary>
        /// Adds a child.
        /// </summary>
        /// <param name="nodeId">The node id.</param>
        /// <param name="title">The title.</param>
        public void AddChild(int nodeId, string title)
        {
            Children.Add(new KeyValuePair<int, string>(nodeId, title));
        }
    }
}
The final piece of the puzzle is the view itself, which is extremely simplistic;
<%@ Page Language="C#" MasterPageFile="~/Views/Shared/Site.Master" Inherits="System.Web.Mvc.ViewPage<PageModel>" %>
<%@ Import Namespace="MVCStore.Views.Page"%>

<asp:Content ID="indexContent" ContentPlaceHolderID="MainContent" runat="server">

    <%if( Model.ParentNodeId != -1 ){ %>
        <%=Html.ActionLink("Up to parent", "PageContent", "Page", new { pageId = Model.ParentNodeId }, null)%>
    <%}%>

    <h2><%=Model.PageTitle%></h2>
    <%=Model.PageContent%>

    <%if( Model.Children.Count > 0 ){ %>

        <h3>Table of Contents</h3>
        <ul>
            <%foreach( KeyValuePair<int, string> toc in Model.Children ){ %>
            <li><%=Html.ActionLink(toc.Value, "PageContent", "Page", new { pageId = toc.Key }, null)%></li>
            <%}%>
        </ul>
    <%}%>

</asp:Content>
The code is again checked into codeplex here (http://fluxmvcstore.codeplex.com/) to bring you to this point, along with an SQL data script to get the content database up to speed.
I hope this is proving useful. I hope to have the next in the series available over the weekend.